Disclosure: This post contains affiliate links to Amazon. If you make a purchase through these links, P1R Racing may receive a small commission at no extra cost to you.
Disclaimer: Please exercise caution when working with electrical wiring and tools. If you are a beginner or uncomfortable working with basic electronics, ask for assistance.
Introduction
Want to feel the speed and stay cool during long stint races without dropping hundreds on off-the-shelf hardware? This step-by-step guide will walk you through building a fully dynamic, game-responsive wind simulator for your sim racing rig for under £100.
Note: This £100 figure covers the core electronic and cooling setup. Buying the required tools, custom air ducts or specialised mounts will increase the total cost.
Tools & General Accessories
Before starting, make sure you have the following tools on hand:
- Standard and Cutting Pliers
- Wire Stripping Tool
- Crimping Tool
- Stepper Drill Bit & Cordless Drill
- Multimeter
- Electrical Tape (your best friend for insulation)
Parts List
Here is everything required for the basic dual-fan build:
- 12V 3A AC-to-DC Power Adapter Supply: ~ £11.98
- Arduino Uno Rev 3: ~ £24.85
- USB Type-A to Type-B Cable (Printer Cable): ~ £5.99
- 20 AWG (2×0.5mm²) 2-Core Electrical Wire: ~ £9.48
- 18 – 22 AWG Wire Crimp Connectors: ~ £7.99
- 2.54mm DuPont Connectors: ~ £6.99
- 2x 120mm PWM High-CFM Server Fans: ~ £13.99
- Electronics Project Box: ~ £9.99
Optional Upgrades
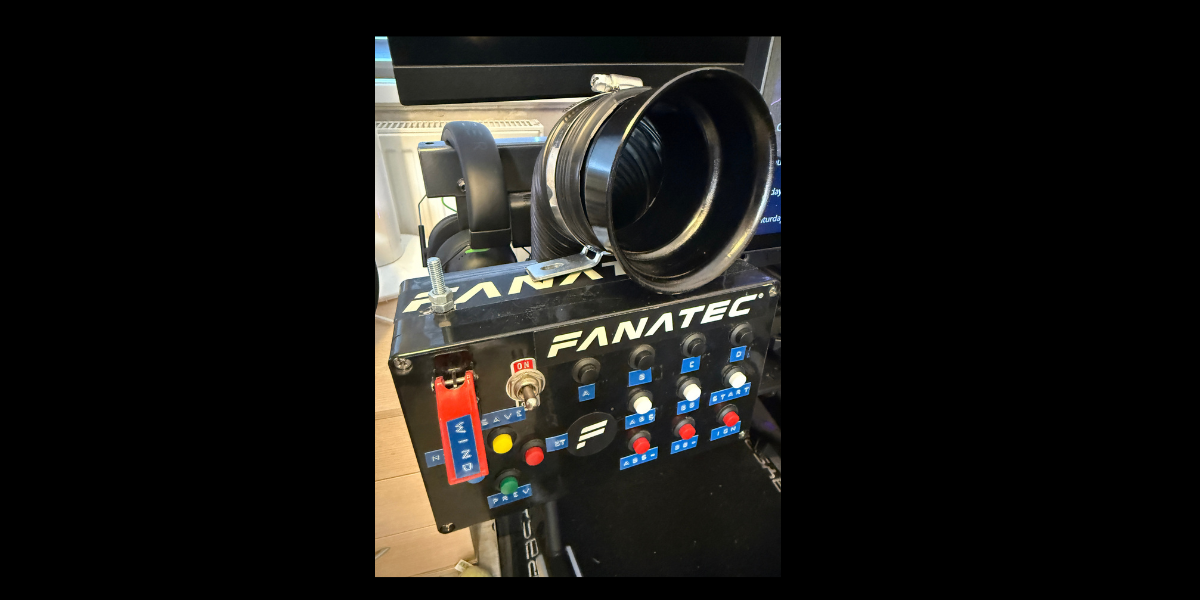
- 2x 3″ (76mm) Cold Air Intake Flexible Duct Pipes: ~ £15.99 each
- 2x 120mm to 3″ Fan Funnel Reducers: ~ £10.00 each
- 2x 120mm Metal Wire Fan Guards: ~ £4.99
- Toggle Switch: ~ £4.99


Wiring Diagram & References
The below diagram was used for reference so credit must be given to Teqqles does VR on YouTube. Whilst I didn’t use this initially, this wiring diagram certainly stopped me from going mad. Watch DIY SimHub Wind Simulator video by Teqqles does VR.

Step-by-Step Assembly Guide
Pro Tip: Always Build a Test Bench First!
Resist the urge to mount everything directly to your rig right away! Set up and test the circuit on a workbench or desk first. Catching wiring mistakes or software settings in a controlled space is 10 times easier than troubleshooting inside a fully assembled cockpit. I’m speaking from experience here!
Step 1: Prepping the Power Supply
- Ensure the 12V adapter is unplugged from the wall.
- Cut off the barrel jack connector at the end of the cable.
- Strip the outer jacket to reveal the positive and negative wires.
- Identify polarity: Some cables have dashed lines indicating ground/negative. If unlabelled, plug the stripped wires into a multi-meter to confirm which wire is 12V Positive (+) and 12V Negative/Ground (-).
Optional: Adding an Inline Toggle Switch
If you want a physical master switch to kill power to the fans (rather than assigning a hotkey in SimHub):
- Wire the 12V Positive (+) wire coming from the power plug directly to one terminal of the toggle switch. (Do not run the ground wire through the switch).
- Attach a fresh length of 2-core wire to the outgoing terminal of the toggle switch; one wire now carries your switched 12V positive power to the fans.
- Connect the 12V Negative/Ground (-) wire from the power source directly to the second core of that outgoing wire so it bypasses the toggle switch entirely; ensuring an unbroken, continuous ground loop to your fans.
Note: As the above parts list includes a 2nd project box, this can be mounted close to your seating position and house the toggle switch and associated wiring.
Step 2: Splitting Power to the Fans & Arduino
Both 12V server fans need direct power from the wall adapter, while the control signals will come from the Arduino board.
- Cut two lengths of 2-core wire long enough to reach from your project box location to where each fan will sit on your rig.
- Combine Positive Lines: Join the 12V positive feed from the power adapter to the positive wires of both fan cables. Join these using the crimp connectors or if preferred, twist, solder, heat-shrink, and tape the joint.
- Combine Ground Lines: Join the power adapter ground wire to both fan ground wires. Crucial: You must also add a third short ground wire to this junction that runs directly to a GND pin on the Arduino board. Shared common ground is essential for the PWM signals to function correctly!
Step 3: Wiring the PWM Fans
Standard 4-pin PC PWM fans follow a standard pinout:
- Pin 1: Ground (-)
- Pin 2: 12V Power (+)
- Pin 3: Tachometer / RPM Signal (Leave Disconnected)
- Pin 4: PWM Speed Control Signal
- Crimp or solder your switched 12V Positive line to Pin 2 on each fan header.
- Crimp or solder your 12V Ground line to Pin 1 on each fan header.
- Run a new single core wire from Pin 4 on Fan 1, and another single core wire from Pin 4 on Fan 2. These two control lines will connect back to the Arduino.
Step 4: Connecting Lines to the Arduino
- Crimp a male 2.54mm DuPont connector onto the PWM signal line from Fan 1 and connect it to Digital Pin D9 on your Arduino Uno.
- Crimp a male DuPont connector onto the PWM signal line from Fan 2 and connect it to Digital Pin D10 on your Arduino Uno.
- Crimp a male DuPont connector to the common Ground wire (from Step 2) to any GND pin on the Arduino Uno.


Step 5: Installing SimHub
- Download and install SimHub.
- Follow the standard installation prompts.
- Recommendation: SimHub is free, but buying a licensed key unlocks 60 FPS update rates and directly supports the creators keeping sim racing accessible!
Step 6: Flashing the Arduino Board
- Plug the USB cable into your Arduino Uno and connect it to a free USB port on the back of your PC.
- Open SimHub and click Arduino on the left menu bar.
- Important: Temporarily disconnect any other custom controllers (like Arduino-based button boxes) to avoid accidentally overwriting their firmware!
- Click Single Arduino at the top, then select Open Arduino Setup Tool.
- If prompted, select Start from scratch.
- Under Board Type on the right panel, select Arduino Uno (or your specific microcontroller model). Select the correct COM Port associated with the device.
- Rename the device to WindSim on the left hand side menu so it’s easy to identify later.
- In the left-hand menu, scroll to ShakeIt PWM Fans Outputs and set the count to 2.
- Verify the output mapping shows Pin 9 and Pin 10. Ensure the Optional Relay setting is unchecked.
- Check the “I Understand” box and click Upload to Arduino. Wait for the confirmation message, then close the tool window.
Step 7: Configuring Fan Behavior in SimHub
- In SimHub’s left menu, go to ShakeIt Wind. (If missing, enable it via Add/Remove Features at the bottom of the left sidebar).
- Under the Wind Profile tab, enable the default wind profile.
- Idle Wind Speed: Set this between 3% and 5%. This keeps a small ambient breeze going during quiet moments or pit stops to prevent server fans from motor stalling, while relying on your hardware or software switch when you want them completely off.
- Outputs Configuration: Click the Outputs Configuration tab at the top. Ensure your Arduino (WindSim) is enabled. Map Channel 1 (Pin 9) to Left and Channel 2 (Pin 10) to Right.
- Speed-Based Wind: Set the scale to 5% to 95% threshold mapping so the airflow ramps up naturally alongside car velocity.
- Curving / Cornering Wind: It’s often best to disable directional cornering wind initially. Ramping fans up and down through every corner apex can quickly become distracting; plain speed-scaling offers much smoother immersion!
- Max Speed Calibration: Leave on Auto, or set a manual speed ceiling (e.g., 100 km/h = 100% wind force) depending on the vehicle class you drive most. I find in most games Auto is fine but in some slower cars or shorter circuits in iRacing for example manual can work better.

Step 8: Final Testing & Mounting
- Go to the ShakeIt Wind screen in SimHub and drag the idle wind power slider up; your fans should spin up accordingly.
- Launch your favourite title (iRacing, F1, Assetto Corsa, ACC, etc.) and head out on track for a test session.
- Once satisfied with the air response, fit finger guards for safety, mount the Arduino into your project box using the stepper bit for neat wire exit.
- Now just mount the fans to your set up and of course any ducts or funnel adapters.
Enjoy the increased immersion and stay cool out on track!
Final Thoughts: Is a Wind Sim Worth It?
There is an ongoing debate in the sim racing community about whether wind simulators are realistic: “Why do I need wind when real race cars have windshields?”
While that’s true, it helps to think of a wind simulator less like ambient weather and more like a speed emulator.
In a real car, your body relies on G-forces, chassis vibrations, and visual depth to gauge velocity. On a static sim rig, blowing dynamic air based on telemetry weirdly trickles into your brain to provide a genuine sense of speed; with the massive bonus of keeping you cool during long stints. Plus, let’s be honest… it just looks cool (pun fully intended).
A Quick Tip on Air Ducts & Reducers
Unless you can mount the fans directly behind your wheel rim or right next to your face, I strongly recommend using air duct piping. Dragging fresh air from lower down or further away makes far more sense than just recirculating hot ambient air around your monitors.
If you go the ducting route, fan reducers are an absolute necessity. You lose an enormous amount of air pressure trying to force air directly from a 120mm square fan face into a 76mm duct.
My top recommendation here is the 120mm fan reducers from simracemods.com. They are exceptionally well-made, completely functional, and look brilliant on a rig. Note: I’m not affiliated with them in any way; I just love giving a shout-out to small manufacturers when they make a quality product!
Looking to improve your lap times?
Get the AB Racing Line Engineer to find out where you’re losing time and get faster now.